

How To Decorate A Clear Pencil Case
It is Emma from Crafting{E} again! It is getting to be the beginning of school for most of us and you know what that means, new school supplies and back to school shopping. But who says you can't add a little personality to those new school supplies?
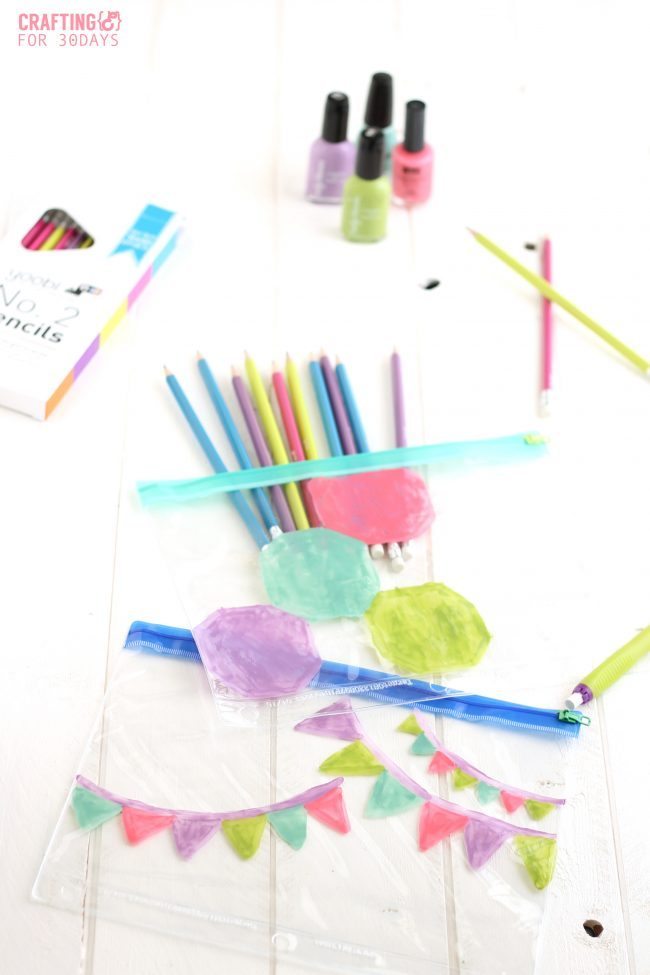
When I was perusing the aisles of Target (which is not an unusual activity for me, in case you were wondering), I came across these simple, clear, vinyl pencil cases for only 99 cents a piece. I just knew I had to buy them and decorate them… they were just begging me to make them look cute. The tricky part was finding a paint that would stick to the clear vinyl…..
in the end I discovered that nail polish actually sticks well to vinyl! Who knew, right? And personally think that the nail polish looks really cool! I mean, think of what you could do nail polish now… the possibilities are endless!
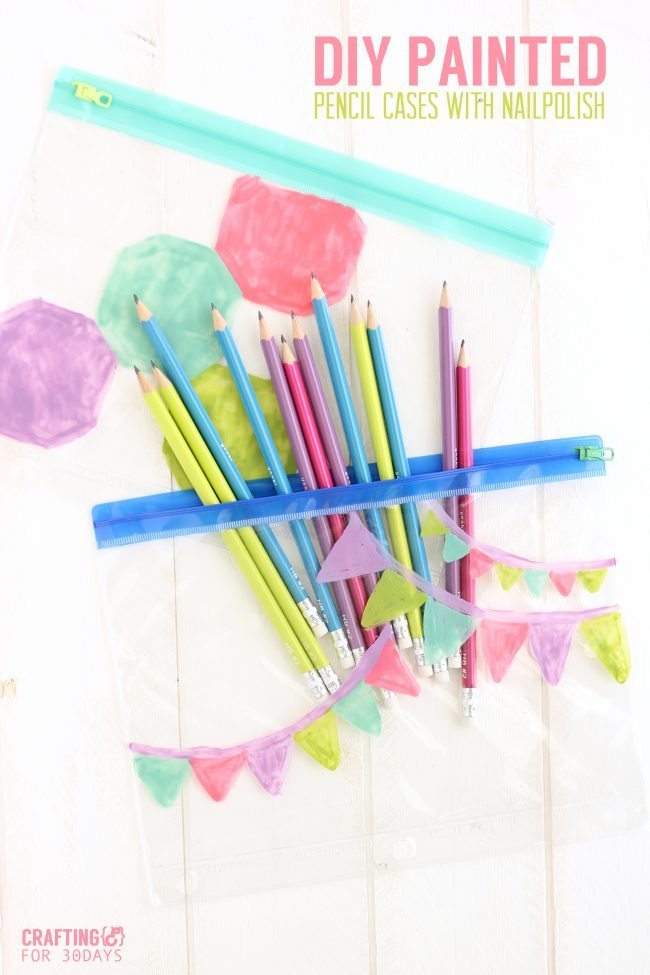
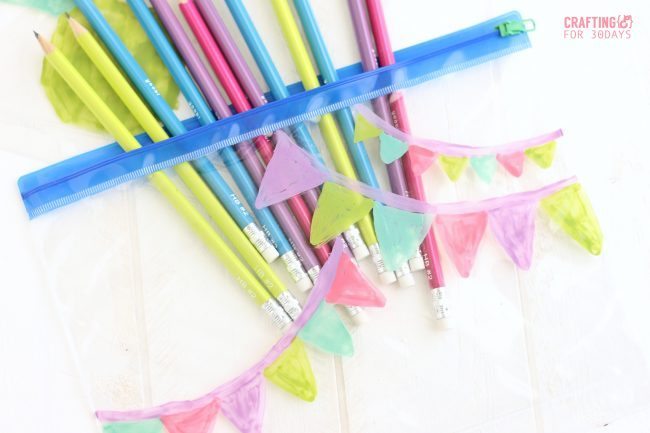
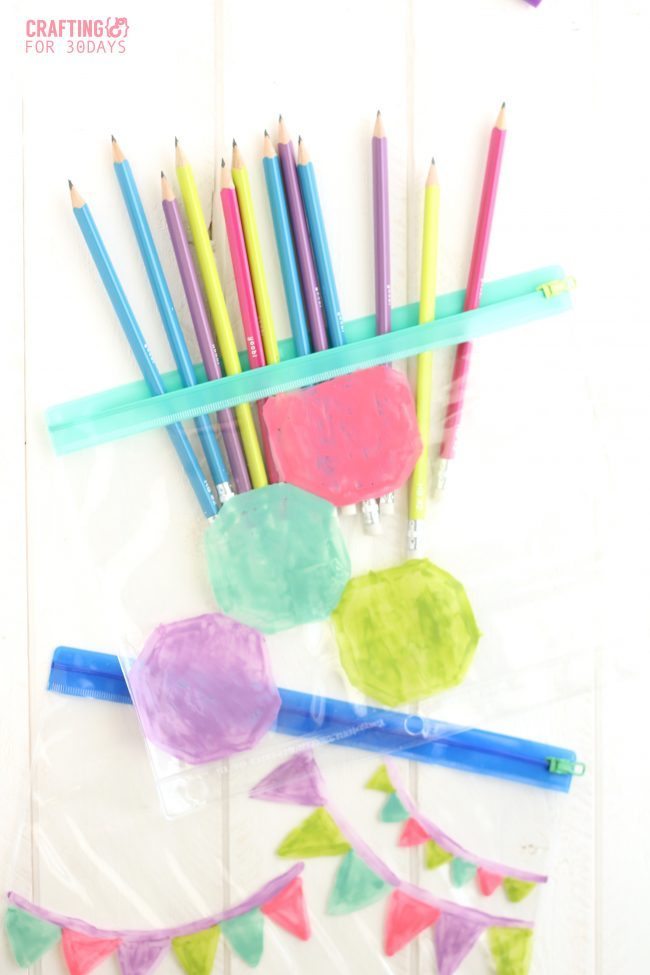 I decorated two pencil cases: one with octagons and the other with some cute banners. Which one is your favorite… I still haven't decided. This project is SO cheap and inexpensive too! In fact, the only thing you probably need to buy is the pencil cases (unless you don't have nail polish on hand, but really, who doesn't), and those are only $1.
Well, here's the SUPER SIMPLE tutorial on how to make these… it's almost embarrassingly short
SUPPLIES:
- Clear vinyl pencil cases (only $1 at most places this time of year. Mine are from Target).
- Different nail polishes. I used all different brands and kinds, so any kind should work.
- Paper stencil and dry erase marker. For the octagon pouch I used a paper stencil and dry erase marker so I knew roughly where to paint, but on the banner pouch I just did it freehand.
DIRECTIONS:
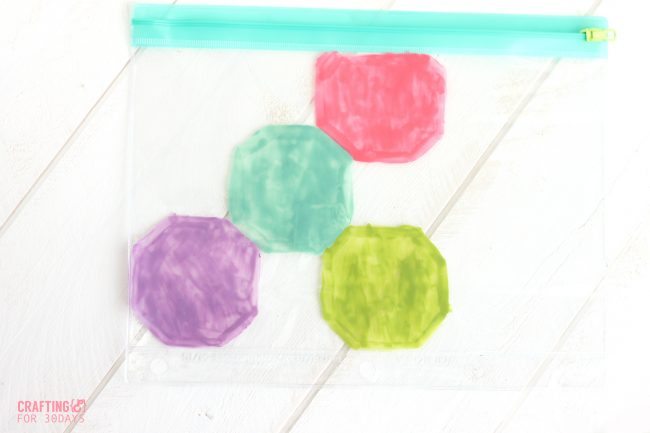
FOR THE OCTAGON POUCH:
- Place your paper stencil wherever you want your octagons to go. Then gently outline it with dry erase marker.
- Paint inside the lines you made with the dry erase marker.
- If there are any dry erase marker lines visible, you should just be able to wipe it off!
- Allow time to dry, then fill it up with fun back to school goodies.
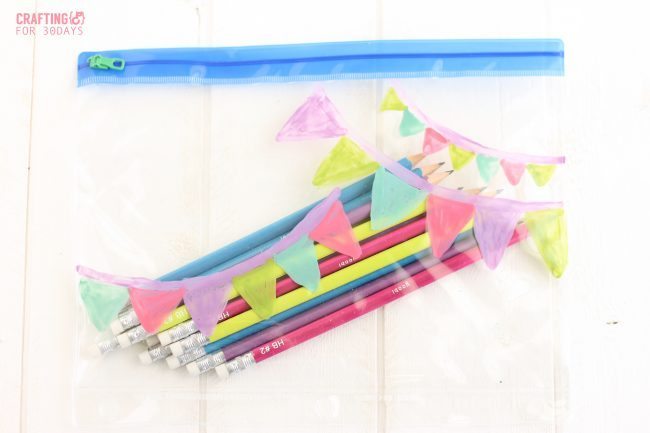
FOR THE BANNER POUCH:
- Using one color of nail polish, paint curved lines where you want the banners to be.
- On the bottom of the lines, paint little triangles.
- Allow time to dry, then fill it up with fun back to school goodies.
And that's it! Enjoy this simple, fun craft that pretty much anyone can do! And don't forget to check out my blog and my Pinterest account for more creative ideas like this one!
How To Decorate A Clear Pencil Case
Source: https://www.thirtyhandmadedays.com/diy-painted-pencil-cases-with-nail-polish/
Posted by: coledisme1997.blogspot.com
0 Response to "How To Decorate A Clear Pencil Case"
Post a Comment